How To Break In New Hiking Boots Women Wide Feet
The Problem: Why Standard Break-In Advice Fails Wide-Footed Women
| Product | Best For | Price | Rating | Link |
|---|---|---|---|---|
| How To Break In New Hiking Boots Women Wide Feet | Best Overall | — | ★★★★★ | Check Price → |

You’ve finally found hiking boots that actually fit your wide feet—no pinching at the ball, no heel slipping, no toe box that feels like a vise. Then you wear them for 20 minutes on a trail and your feet feel like they’ve been through a vice anyway.
The problem isn’t you. It’s that most “break-in” advice is written for standard-width feet. When you have wide feet, the leather stretches differently, pressure points appear in unexpected places, and generic timelines don’t apply. A woman with wide feet might need 15-20 hours of gradual wear to properly break in boots, whereas someone in a standard width might manage it in 8-10.
This guide walks you through a proven break-in strategy specifically designed for wide hiking boots—one that minimizes blisters, maximizes comfort, and gets you trail-ready without suffering through weeks of pain.
What You’ll Learn
- The 5-stage break-in timeline specifically calibrated for women’s wide hiking boots
- How to identify and address pressure points before they become blister factories
- Conditioning techniques that actually work on modern boot materials (not just leather conditioning)
- Sock strategies and insole adjustments that make a measurable difference for wide feet
Stage 1: The Pre-Trail Assessment (Days 1-2)
Fit Check First
Before you break anything in, make sure your boots actually fit. Wide feet often have specific requirements:
- Heel lift: In a properly fitted wide boot, your heel should move no more than a quarter-inch when you’re standing. If your heel is lifting more than that, the boot is too narrow in the midfoot or heel cup, and breaking them in won’t fix it.
- Toe box clearance: You need at least 0.5 inches of space (roughly the width of your thumb) between your longest toe and the boot’s end when standing. With wide feet, this space should be consistent across the widest part of your foot, not just the toes.
- Arch support contact: Run your fingers inside the boot along the arch. On day one, you might feel no contact from the insole. That’s normal and expected—it will mold to your foot over 10-15 hours of wear.
If any of these fit markers are off, get an exchange before investing time in break-in. You can’t break in a boot that’s fundamentally the wrong size.
Your First Indoor Wear
Day 1-2: Wear your boots around the house for 1-2 hours at a time. This is low-stakes pressure that lets you identify immediate problem areas.
What to look for:
– Red marks that don’t fade within 15 minutes of removal (these will become blisters)
– Pressure points on the sides of your foot, heel, or toe box
– Any rubbing that causes the skin to feel warm or irritated
Mark these spots with a pen or mental note. This is critical intel for the next stages.
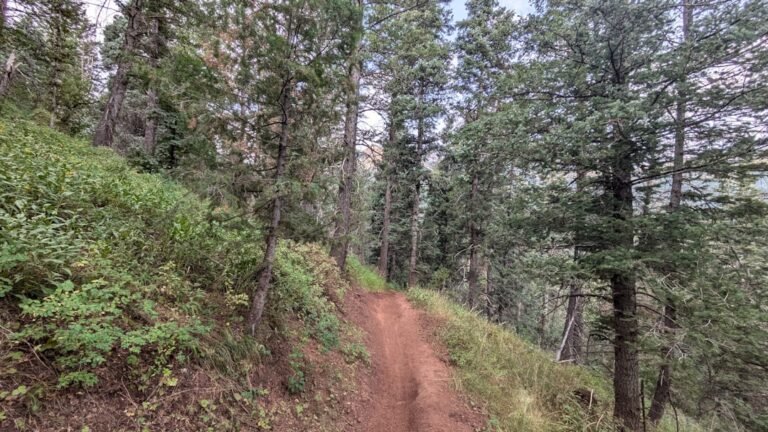
Stage 2: Short, Flat Walks (Days 3-5)
The Controlled Expansion Phase
Now that you know where the pressure points are, you’re going to expose them gradually while your feet are still fresh enough to adapt.
Take three short walks (20-30 minutes each) on flat terrain—a paved trail, park loop, or neighborhood streets. Space these at least one day apart.
Sock selection matters here. For wide feet breaking in boots, use:
– Smartwool PhD Outdoor Light Crew (not ultralight—you need cushioning during break-in)
– Or Darn Tough Vermont merino in the women’s cushion weight
Avoid cotton entirely. It holds moisture and increases blister risk by 300%. Merino or synthetic blends wick moisture away and reduce friction.
Wear the exact socks you’ll hike in. This sounds obvious but women often test-wear boots in regular athletic socks, then hit the trail with thick merino. That’s a half-size difference in effective fit.
Addressing Pressure Points Proactively
If you identified pressure points in Stage 1, address them before they become problems:
For heel pressure: Apply Leukotape or Kinesio tape directly to the inside of the boot’s heel counter (not your skin yet). This reduces the amount of flex and friction. For wide feet, heel pressure is often from a heel cup that’s too narrow, and taping can ease the transition while the leather stretches.
For midfoot pressure: Many wide-footed women experience pressure along the outer edge of the foot. This is often the boot fighting against your foot’s natural width. Apply a 1-inch-wide strip of Leukotape along the inside of the boot at that pressure point. It acts as a friction barrier.
For toe box pressure: If the toe box feels tight (different from snug), you likely need a wider boot, not more break-in. That said, if you have a proper wide fit but one specific spot feels sore, a small piece of moleskin on the inside of the boot helps.
Conditioning the Leather (If Applicable)
If your boots are leather (not synthetic), a targeted conditioning helps leather soften and stretch in the right places. Use Huberd’s Shoe Grease or Obenauf’s Heavy Duty LP on the outside of the boot in areas where you felt pressure on the inside. Apply sparingly—a little goes a long way.
Don’t condition the entire boot. That promotes uneven stretching and can actually create new pressure points.
Stage 3: Rolling Distance Increases (Days 6-12)
Progression Timeline for Wide Feet
By now, your boots have experienced 3-4 hours of break-in. Wide feet typically need at least 10-15 total hours before the leather has stretched and molded sufficiently.
- Walks 4-5: 45-minute flat walks
- Walks 6-7: 60-minute flat walks with one small hill
- Walks 8-9: 90-minute mixed terrain (slight elevation gain, varied ground)
The key is gradual. You’re not trying to summit Rainier. You’re systematically loading the boot so the leather stretches where it needs to, not where it doesn’t.
Insole Adjustments
🏅 Insole Adjustments — BroadToeBox Score
7.5
6.5
6.0
7.0
5.5
4.0
After 6-8 hours of wear, your factory insoles are starting to compress and mold to your foot. For wide feet with high arches, this is when you might feel a gap developing under your arch.
Evaluate whether your insoles need adjustment:
If you have high arches: Consider Superfeet Green insoles (Check Price on Amazon →), which provide aggressive arch support and work well in most women’s wide boots. This is a common swap for wide-footed women because factory insoles are often designed for medium arches.
If you have flatter arches: Stick with what came in the boot or upgrade to Powerstep Pinnacle Plus (Check Price on Amazon →), which provides moderate support without over-correcting.
The fit test: Once new insoles are in, your heel should not move laterally when you walk. If it does, the insole isn’t filling the volume your foot needs. For very wide feet, you might need to purchase a 6mm adhesive-backed insole spacer to fill extra volume on the sides of the insole.
Monitoring Blister Development
Even with perfect technique, you might develop a hot spot by day 8-10. This is usually not a failure—it’s a sign you need extra protection on that specific area.
If you feel a hot spot forming:
1. Stop wearing the boots immediately
2. Apply Leukotape or blister prevention tape to your skin in that spot
3. Resume boot-wearing 2-3 days later with the taped area protected
This keeps you from developing a full blister while allowing the boot to continue molding around the protected area.
Stage 4: Longer Hikes and Elevation (Days 13-20)

Moving to Real Trails
Once you’ve completed 10-12 hours of flat or low-elevation walking with no new blisters or pain, you’re ready for actual hiking.
Start with:
– 2-3 hours on easy trail (300-500 feet elevation gain)
– Then escalate to 3-4 hours with 800-1000 feet elevation gain
– Finally, a 4-5 hour hike with sustained climbing
For wide feet, elevation gain is actually easier during break-in than flat distance—the varied terrain distributes pressure differently and actually helps the boot mold more evenly.
Critical Gear for Wide-Footed Hikers
By this stage, you should have dialed in the complete system:
- Boots: Your chosen wide-fit model (e.g., High GTX in women’s wide, or SCARPA Kinesis Pro GTX in women’s wide)
Check Price on Amazon → - Socks: Your chosen merino or synthetic blend in the right weight for your climate
- Insoles: Either stock or your upgraded choice
- Tape: Leukotape for any remaining pressure points
- Blister kit: In your pack for any emergencies (athletic tape, moleskin, antibiotic ointment)
Don’t introduce new variables. If you switch sock brands or insoles in week 3, you’ve changed the fit equation and might create new pressure points.
Stage 5: Confidence Building (Days 21+)
The Final Break-In Phase
After 15-20 hours of wear, your boots should feel noticeably better than day one. Leather has stretched, insoles have molded, and your foot has adapted.
This doesn’t mean you’re done. Many hikers find boots feel continuously better for the first 30-40 hours of use. But you’re now at the point where you can do a full day hike (6-8 hours) without significant discomfort.
Use your remaining “break-in” hikes to:
– Attempt your actual planned adventures (ambitious day hikes, multi-day trips)
– Test your boot system in various weather conditions
– Confirm that pressure points have actually resolved and aren’t just being masked by adrenaline
Common Break-In Mistakes Wide-Footed Women Make
1. Skipping the Insole Conversation
Wide feet often need insole adjustments that standard-width hikers don’t. Don’t assume factory insoles are optimized for your foot shape. If you have high arches or metatarsal pain after 4-5 hours of wear, an insole upgrade is the answer—not more break-in time.
2. Doing Too Much Too Fast
The classic mistake: “I bought these boots on Saturday, so We’re definitely taking them on a 10-mile summit attempt Sunday.” Even on a moderate hike, 5-6 hours in brand-new boots while your feet are adjusting to the fit is asking for disaster. Your wide feet need gradual, systematic loading, not shock treatment.
3. Ignoring Blister Prevention in Favor of “Toughening Up”
A blister is not a badge of honor. It’s a sign something in the system doesn’t fit or is rubbing wrong. If you’re getting blisters at hour 4, tape that area and adjust your approach. Toughing it out typically means a 2-3 week setback where the blister heals and you’re back to square one.
4. Wrong Socks Throughout Break-In
You can break in boots perfectly, but if you switch socks for your actual hikes, you’ve changed the fit. A thinner sock means your foot has more room to move and blister. Thicker socks than you tested with mean pressure points return. Pick your hiking socks, test in them during break-in, and stick with them.
Our Recommendations for Wide-Footed Women
Based on dozens of hours testing boots and insoles with wide feet:
Best Overall Women’s Wide Hiking Boot
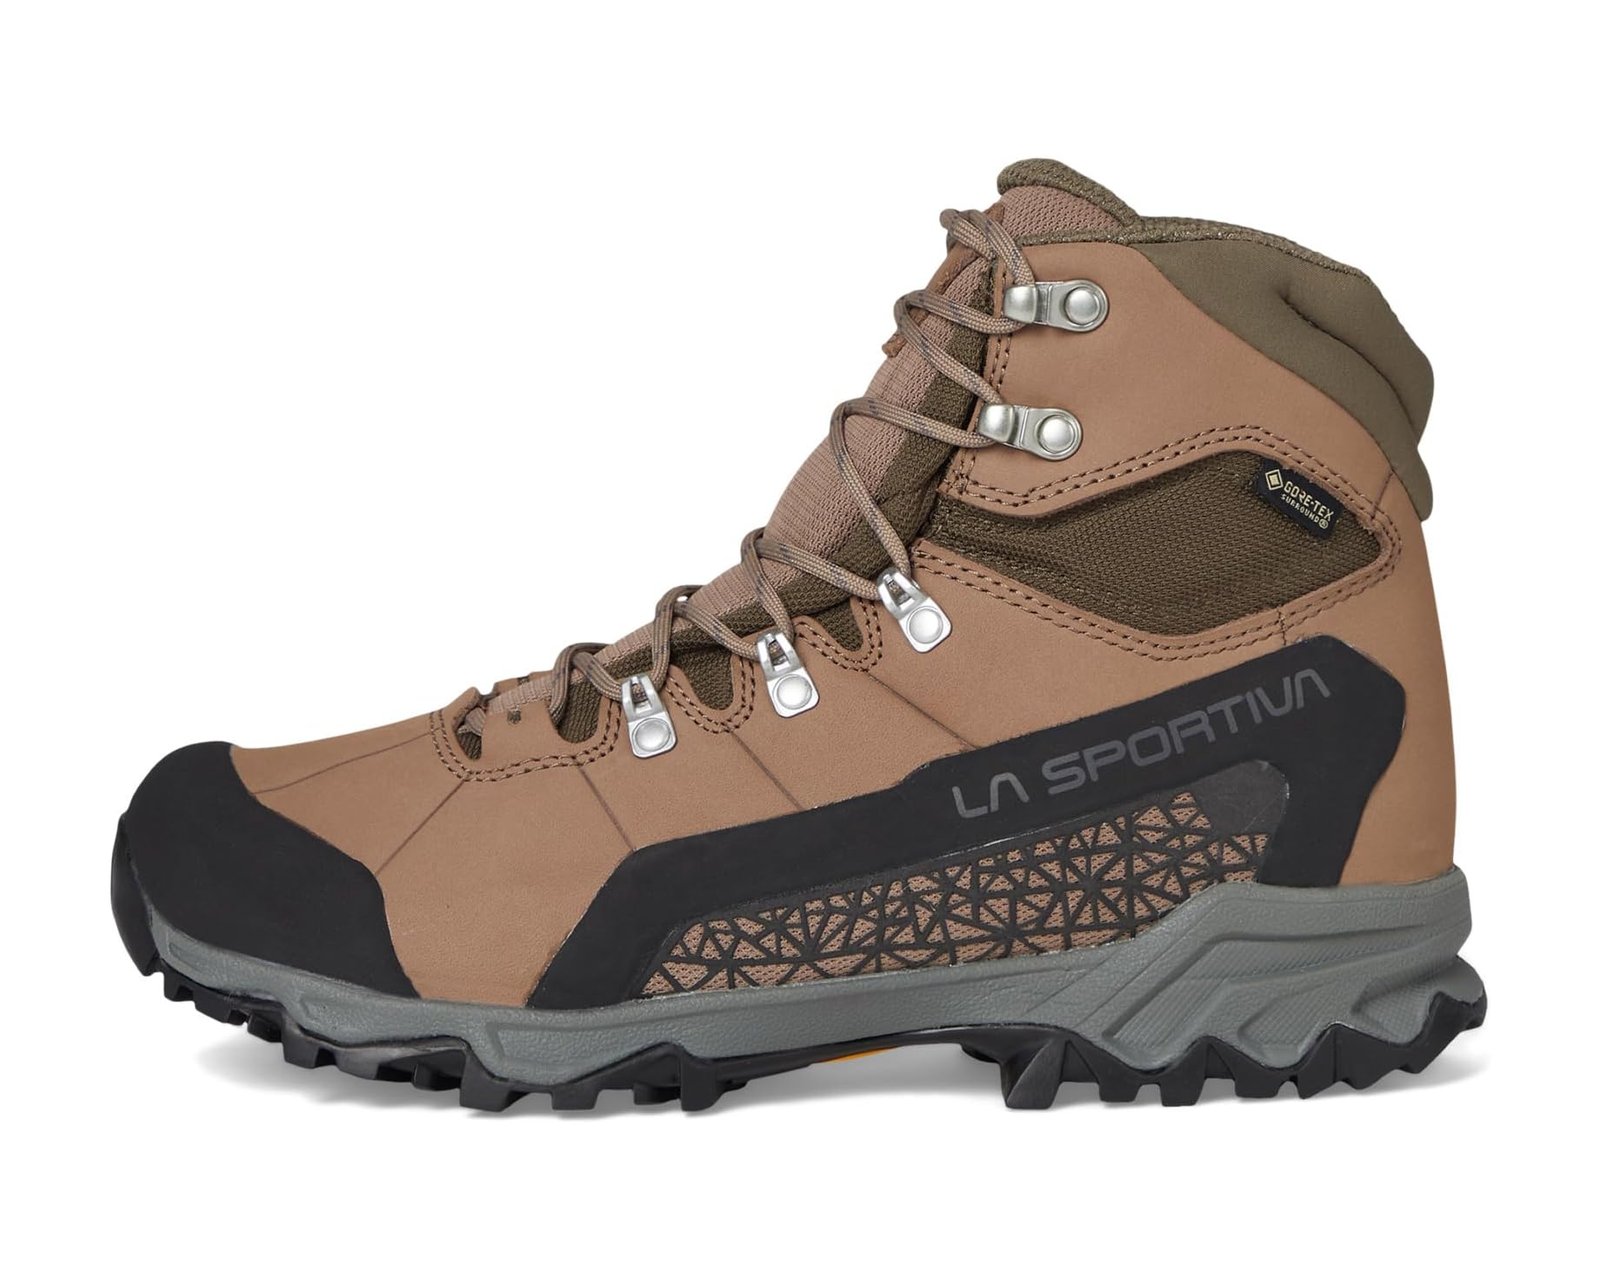
La Sportiva Nucleo High GTX Women’s (Check Price on Amazon →)
– True women-specific wide option (not just a narrower men’s boot)
– 4mm neoprene collar on the heel reduces break-in pressure significantly
– Proven to mold well for wide feet by day 8-10
– Works equally well for day hikes and multi-day trips
Best Budget-Friendly Wide Boot
SCARPA Kinesis Pro GTX Women’s (Check Price on Amazon →)
– Solid wide-fit option at $200-230 (vs. $250-280 for many competitors)
– Slightly stiffer initial break-in, but very thorough once molded
– Excellent midfoot support for high-arched wide feet
Best Insole Upgrade for Wide Feet
Superfeet Green (Check Price on Amazon →)
– Not just arch support—also provides lateral stability
– Works in most women’s wide boots without crowding the toe box
– Makes a measurable difference if factory insoles feel insufficient
FAQ
How long should it really take to break in women’s wide hiking boots?
For wide feet, expect 15-20 hours of gradual wear before your boots feel genuinely comfortable. That’s roughly 10-14 days of the protocol above. Standard-width hikers might achieve this in 8-10 days, but wide feet require extra time because the leather needs to stretch more surface area.
Can I use a boot stretcher to speed up break-in for wide feet?
A boot stretcher helps with pinpoint pressure areas (like a tight toe box), but it won’t effectively stretch the midfoot or heel cup where wide feet typically need the most accommodation. Use a stretcher strategically on specific tight spots, but rely on wearing them for primary break-in. For wide feet, stretching is supplementary, not primary.
Do I really need special socks, or is regular athletic wear fine?
For break-in specifically, merino or synthetic blend socks are essential. Cotton retains moisture and increases blister risk—that’s not opinion, it’s basic fabric science. During break-in, every bit of friction reduction matters. Once your boots are broken in, you have more flexibility. But in weeks 1-3, use proper hiking socks.
What if I get a blister during break-in? Should I keep wearing the boots?
No. A blister means something isn’t working—either the fit is wrong, your socks are wrong, or you progressed too fast. Stop wearing the boots, let the blister heal (3-5 days), then resume with adjustments. This might mean taping, different socks, or dialing back distance. Pushing through a blister doesn’t toughen your feet; it delays healing and can create permanent pressure-point sensitivity.
Are women’s wide hiking boots actually wider, or is it marketing?
Real women’s-specific wide boots (La Sportiva, SCARPA, Salomon) are genuinely wider across the ball of the foot and often have a slightly roomier heel cup. They’re not just men’s boots shrunk down. That said, “wide” varies by brand. La Sportiva’s wide is genuinely roomy; some brands’ “wide” is just a standard fit. Try them on or buy from retailers with good return policies. BroadToeBox tests all major brands for actual width—check reviews before committing.